Fall DIY’s
Spend time with your loved ones by baking pies, carving pumpkins, or even making one of these fall DIYs.
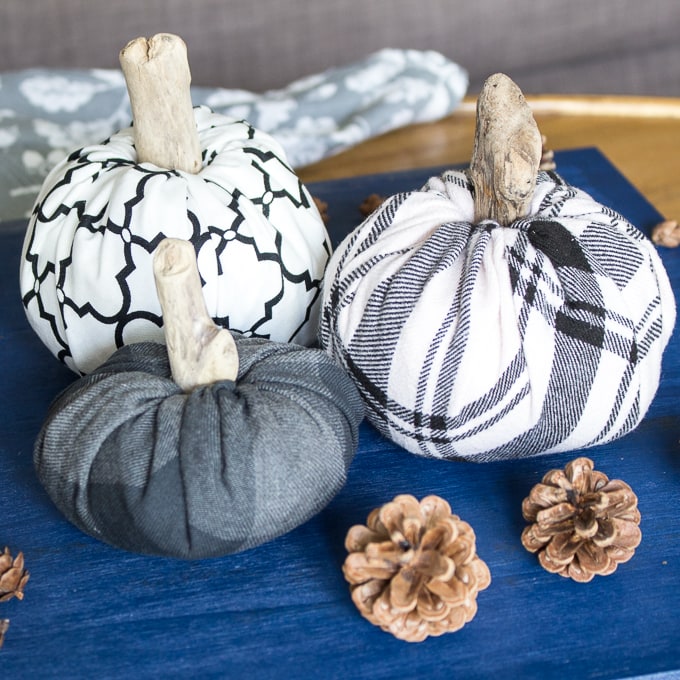
Photography, https://www.getgreenbewell.com/wp-content/uploads/2018/09/DIY-Scrap-Fabric-Pumpkins-1-1.jpg
Making your own fall decorations like these fabric pumpkins is easier than you think.
As the days pass by and we get closer to Halloween, the spooky decorations come out. If you want to participate in the glory of cobwebs and corn mazes but you don’t have much pocket change, consider creating your own masterpieces.
Fabric pumpkins have become wildly popular recently. To make your own, you need fabric (a fabric quarter from any craft store should be plenty), cotton stuffing, yarn/twine used as thread, and a needle that fits what you’re using as thread. The first step is to fold the fabric in half and sew it closed to create a tube-like structure. The pattern should be on the inside at this point. Then you are going to sew another side and gently pull your thread to create an open cylinder shape. Flip the fabric right-side out and fill it with stuffing. It should have a lot of stuffing in it to give it a sturdy structure; you don’t want a limp pumpkin. Now it starts to get tricky. Sew the top closed using the same system as used on the bottom. You should start on the inside to keep knots hidden. Pull the thread tight and tie it off. To create the typical pumpkin indents, pull thread from the bottom, out the top, and around the edge. Repeat this process all around the pumpkin, pulling tightly. Finish it off by hot gluing a fake stick or other stem-like object to the top.
Another staple of fall decorations are door signs. What you’ll need to make your own are ribbon, boards, a drill, an over-the-door hook, and paint (optional). Take your boards, whether blank or predesigned, and drill four holes, one in each corner. I recommend having three or four boards of the same width. If they are blank, paint them at this time. You could have scary “Beware” signs or take the friendlier “Gather” approach. Once the paint is dry, cut ribbon about a two feet longer than twice the total height of the boards. Arrange the boards in the order you want them. Pull one end of ribbon through the bottom corner on the lowest board, tying a knot in the back. Loop it through all the holes on the first side tying a knot under each level. Once you reach the top, leave enough ribbon to allow for hanging and continue looping and tying down the other side. Once finished, take the door hook and hang the sign.
A really simple fall design is a Mason jar organizer. Simply take any amount of Mason jars, paint them, tie some twine around the top, and arrange them. You could express words like “Fall” and “Leaves” on them or use chalkboard paint and make designs for every season. These jars can be used to store anything from pencils to pearls.
Halloween and fall are times to enjoy friends and family. Spend time with your loved ones by baking pies, carving pumpkins, or even making one of these fall DIYs.